Getting Started with Atmel Studio
Atmel AVR microcontroller programming using Atmel Studio 7
Introduction
Atmel, AVR microcontrollers (MCUs) are very easy to use. All AVR microcontrollers require Integrated Development Environment(IDE) such as Atmel Studio. Using this IDE, we can create, compile, and debug programs on all AVR microcontrollers.
Atmel Studio is available free of charge. To download and install the latest Atmel studio use this link.
Note: There are possibly two options for downloading and installing Atmel Studio as online/offline. Atmel recommends for online web installer so use an online web installer if possible.
Here, we are using Atmel Studio 7 as the currently the latest IDE for developing the program of Atmega16 microcontroller.
Atmel Studio 7 includes the GCC C and C++ compiler, assembler, and a simulator, and interfaces seamlessly with in-system debuggers and programmers to make code development easier.
Let’s develop a simple LED Blinking program for ATmega16 using Atmel Studio 7
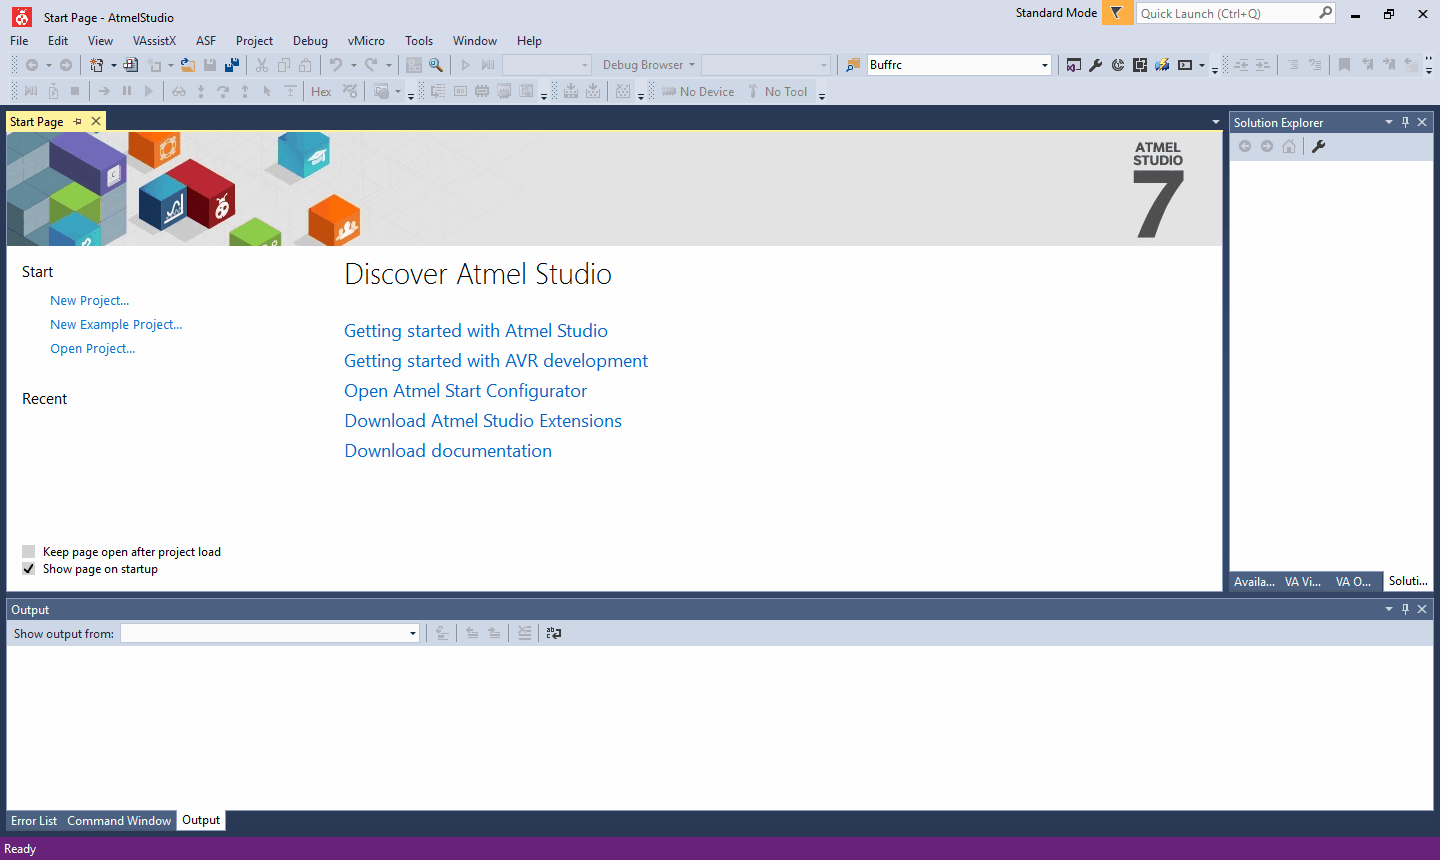
1. After done with downloading and installing, Open Atmel Studio 7. We can see Start Page as shown in the below figure.
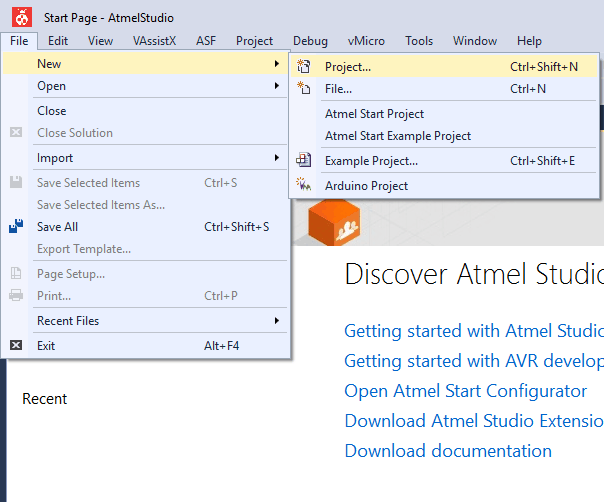
2. Now to create a new project Click on File -> New -> Project or simply use Ctrl+Shift+N Short keys.
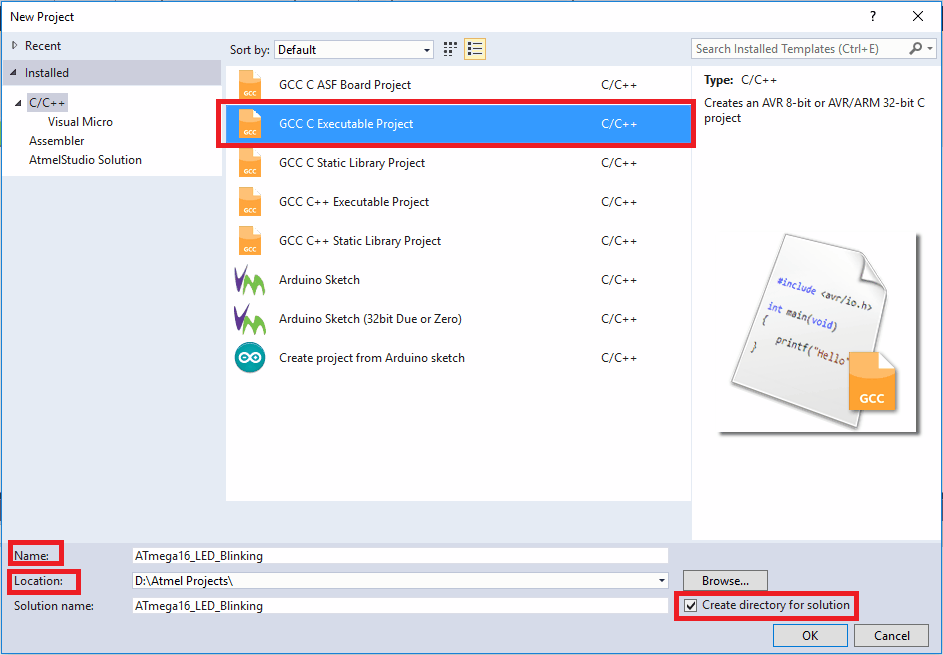
3. A New Project window will pop up as shown in the below figure. In the New Project window, we need to select the project type as listed in the below figure, the Name for the project (which may title of the project), and the Location to where we can save project work.
Also, there is an option Create directory for a solution, which will create a project directory with the name of the project at the provided location.
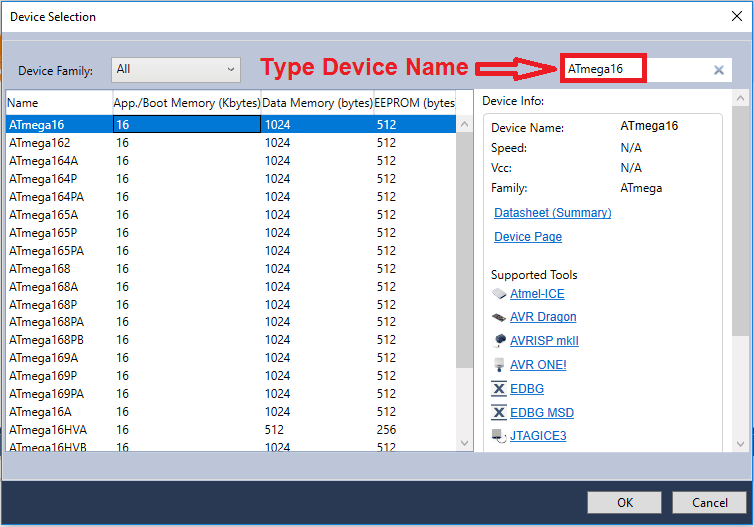
4. After clicking on OK, the Device Selection window will pop up as shown in the below figure. In that, we can directly type the device name to get the required device from the device list shown in the below figure.
Click on the device name and then click OK. Here we have selected the ATmega16 microcontroller device.
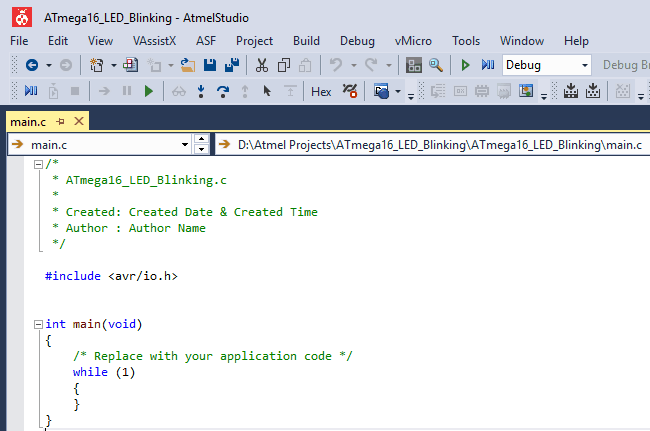
5. Now wait till Atmel studio creates a project and main.c file to write a program for the selected device as shown in the below figure.
6. Now write a program. Here we are writing a program for LED Blinking connected to a PORTB of ATmega16.
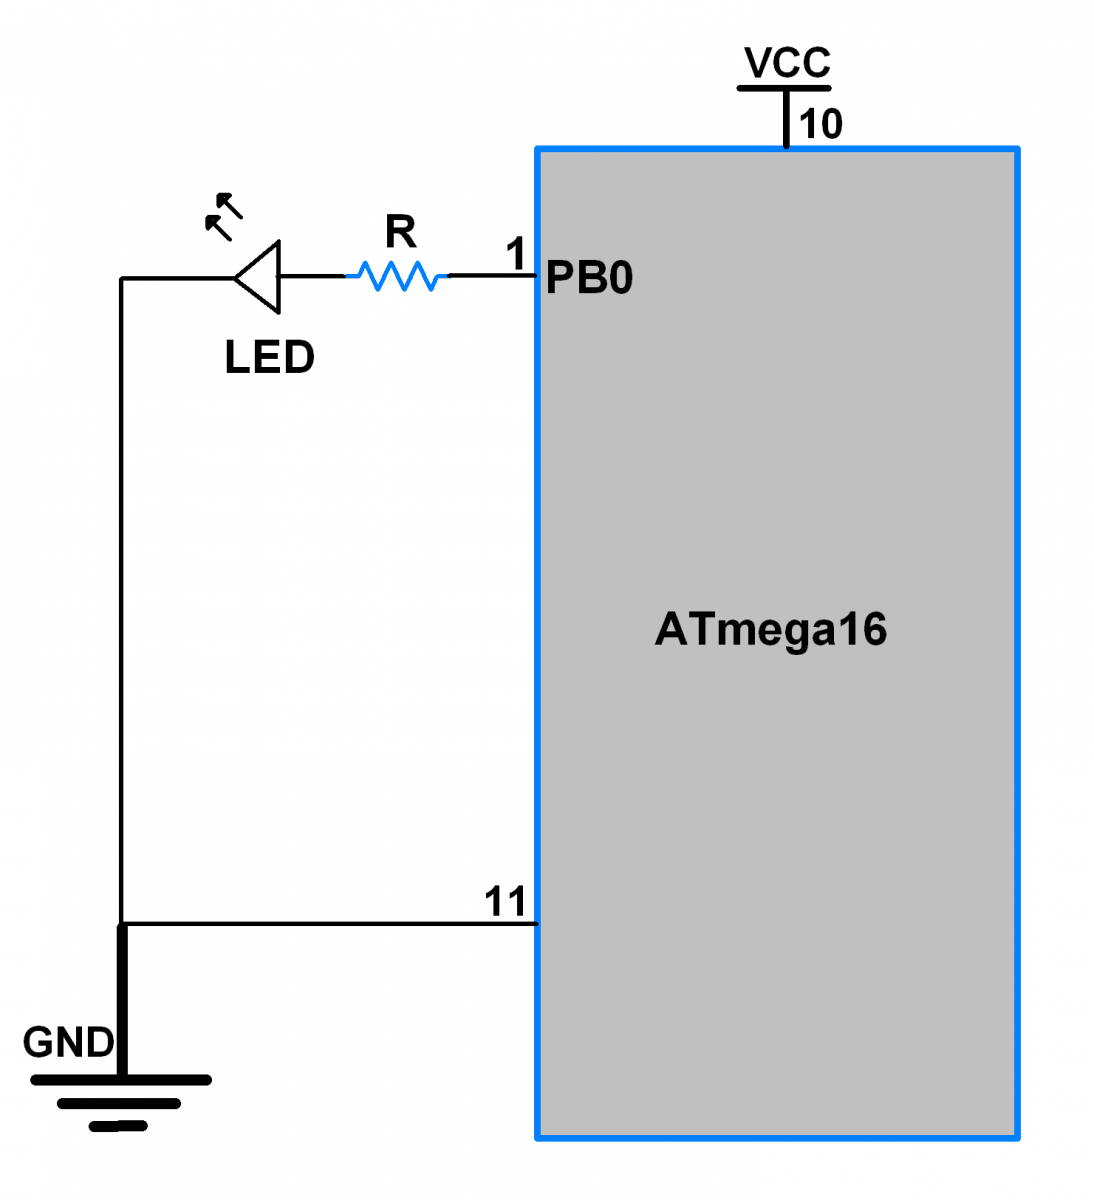
ATmega16/32 LED Blinking Program
/*
 * ATmega16_LED_Blinking.c
 * http://www.electronicwings.com
 * Created: Created Date & Created Time
 * Author : Author Name
 */

#define F_CPU 8000000UL	/* Define CPU frequency here 8MHz */
#include <avr/io.h>
#include <util/delay.h>


int main(void)
{
    DDRB = 0xFF;	/* Make all pins of PORTB as output pins */

    while (1)		/* Blink PORTB infinitely */
    {
	PORTB = 0x00;
	_delay_ms(500);	/* Delay of 500 milli second */
	PORTB = 0xFF;
	_delay_ms(500);
    }
}
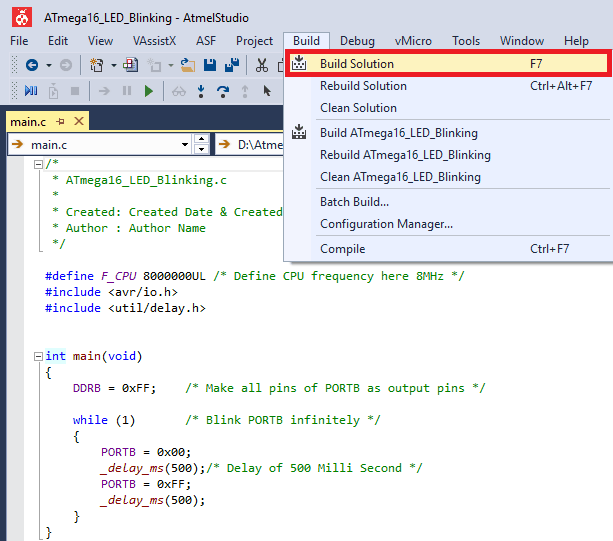
7. After writing the program, save (Ctrl+S) the program and click on Build Solution from the Build menu as shown in the below figure.
Also, we can use the F7 short key for the Build solution.
8. Now we can see build succeeded output in Output Window (lower left corner of window) as shown in below figure.
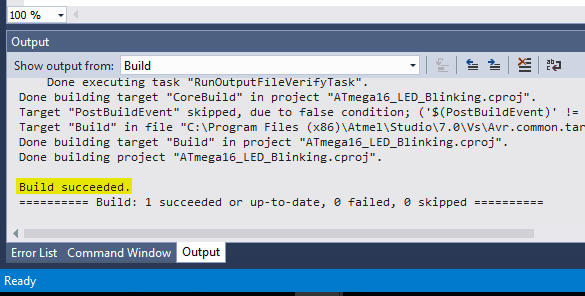
9. Now we can see generated.hex file in the Debug directory of the main project directory. Here we have created a hex file at,
D:\AtmelProjects\ATmega16_LED_Blinking\ATmega16_LED_Blinking\Debug\ ATmega16_LED_Blinking.hex
10. Now upload this hex file to the ATmega microcontroller. AVRDUDE is a program to burn hex code into the Atmel AVR microcontroller.
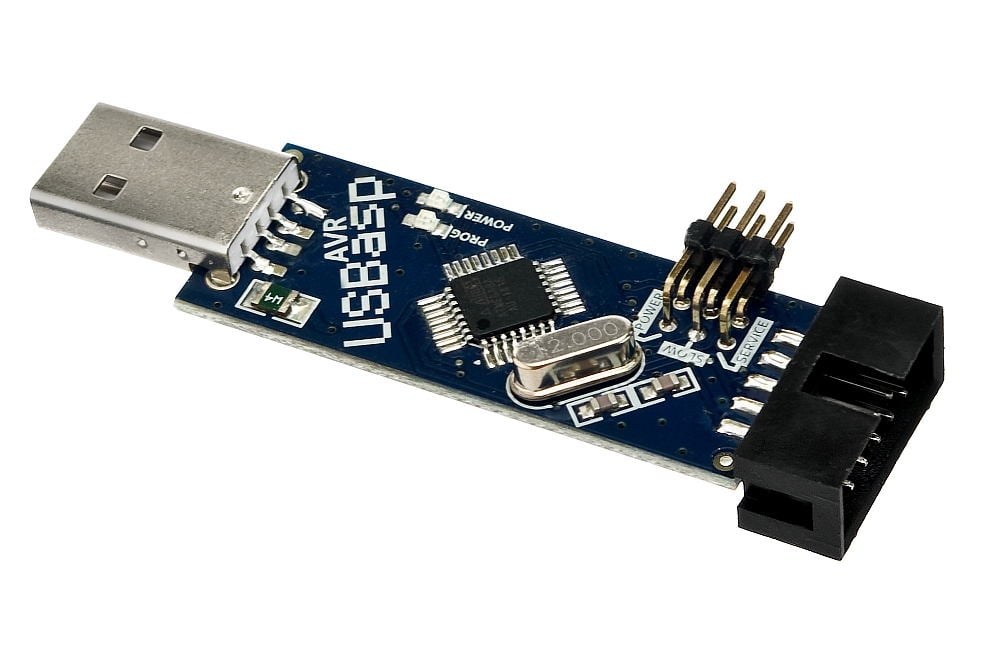
SinaProg (find in attachment given below) is AVRDUDE GUI software, which utilizes the AVRDUDE program to burn hex code into the Atmel AVR microcontroller using USBasp.
USBasp is a USB in-circuit programmer for Atmel AVR controllers.
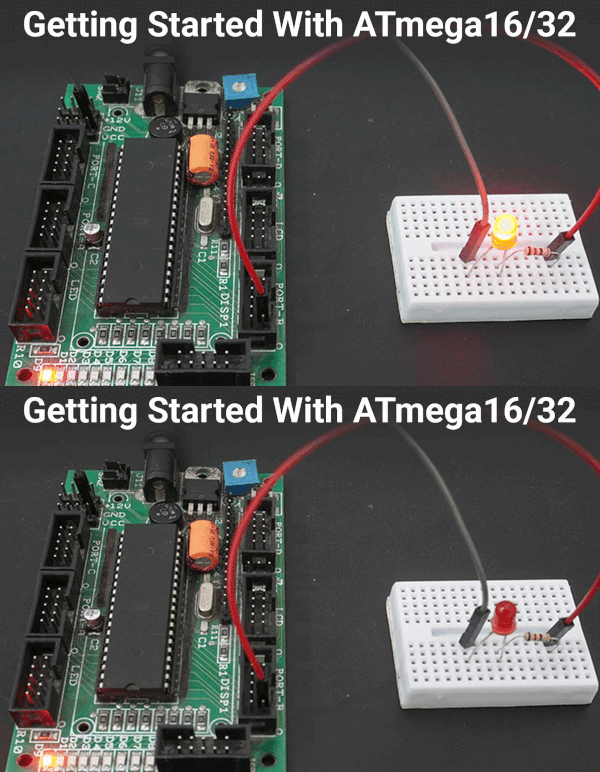
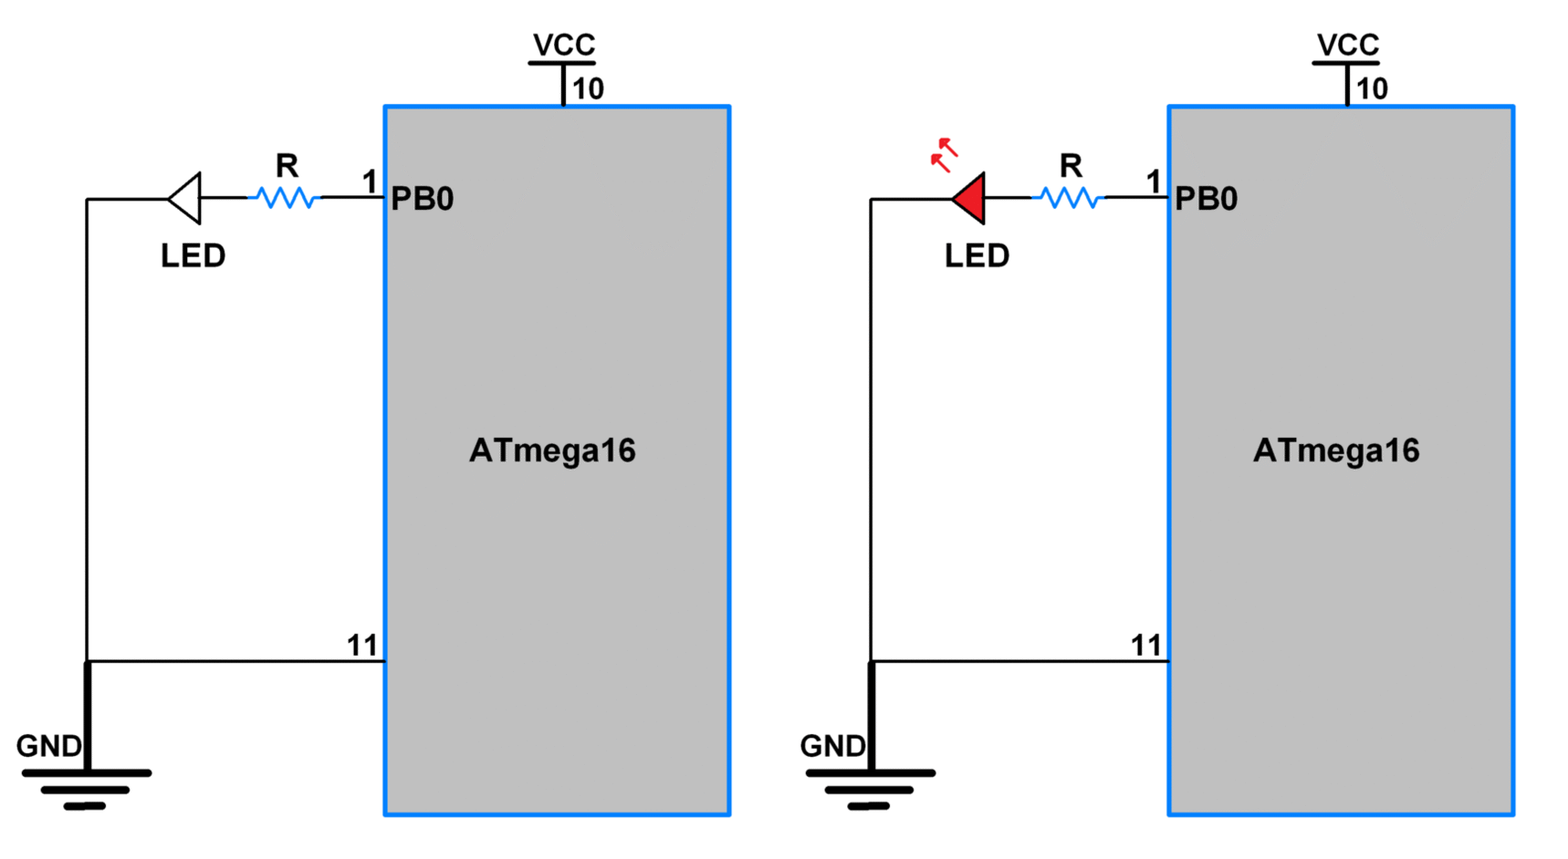
11. After uploading the above program connect the LED to ATmega16, it will start blinking as shown below.
Downloads
Comments15
Join the discussion — share a question or tip.
- VI
I have created simple GUI flashing software for Atmega16/32A, specifically design for students and learners you can download it from here -> https://github.com/itsvishalchavda/WinAVRFlasher/releases/tag/v1.0
- HA
love to learn from your website
- MI
can i get approx 1.3 amp output from the pin
- AB
why this code gives me compilation error!! I know it's out of topic but I would appreciate any help :) #include <stdio.h> const int SZ=30; typedef struct { char s[SZ]; } st; int main() { st obj; strcpy(obj.s, "hello world"); printf("%s", obj.s); return 0; }
- OL
Amazing site with very good examples and tutorials. Is it possible to use an older and smaller version of Atmel Studio ? Or is it possible to use Arduino IDE plus Atmega addons or maybe GCC AVR ?
- GJ
I want to know how to write the program code to blink led when input is given at ADC in ATmega328p
- SA
The above code is working finely with atmega32a but is not working for m328p. can you tell me why?. I changed the clock speed and also tested sample programm in second section that works fine with both micro-controllers. PORTB = 0x00; _delay_ms(500); PORTB = 0xFF; _delay_ms(500)
- RO
this website is amazing. #gr8 job . i need lil help. how to add new libraries (External libraries like lcd.h, dht11.h etc)in atmel studio? please guide me as early as possible.
- SI
Great one man . Your website is great !