MoistureMate-Smart Plant Hydration System




203
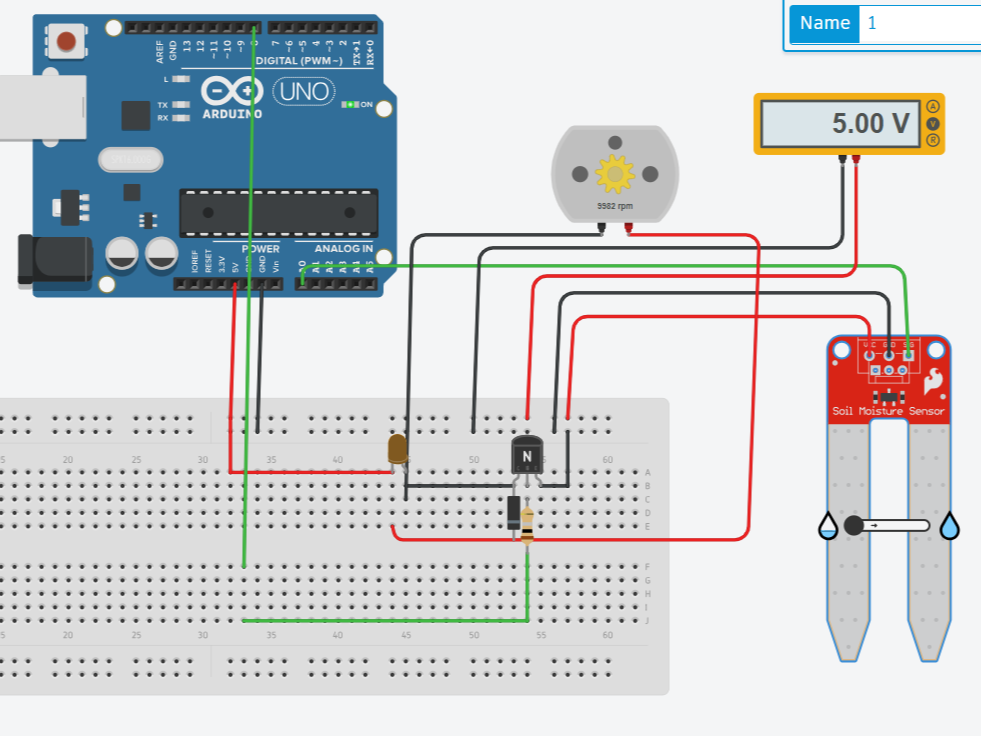
Components Used
Powered by

MOTOR
× 1Any motor that you want to test
Gather Your Materials:
- Arduino microcontroller
- Soil moisture sensor
- Motor
- Power supply (battery or adapter)
- Jumper wires
- Water container/reservoir
- Resistor, Diode and LED
Assemble the Circuit:
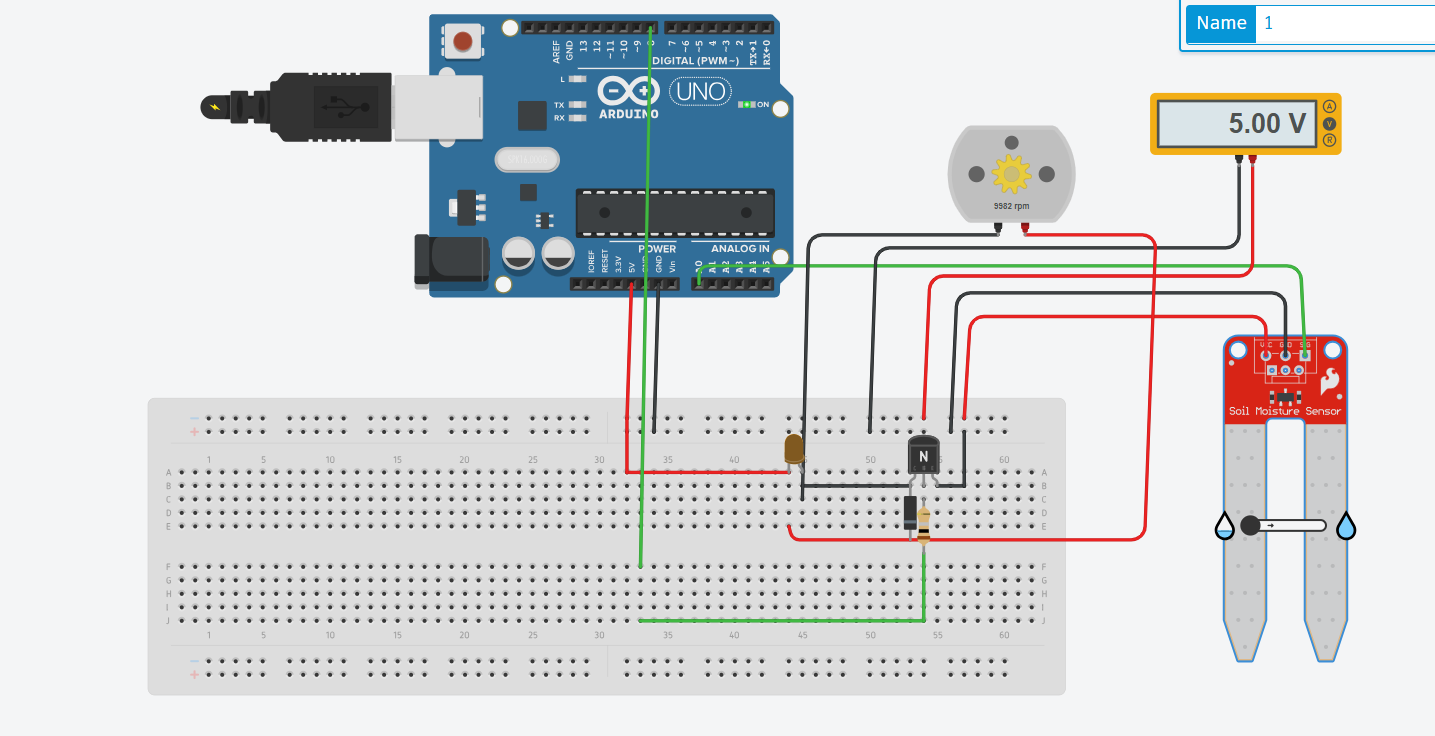
- Connect the soil moisture sensor to the Arduino following the pinout diagram provided with the sensor.
- Connect the water pump to the Arduino. You may need to use a relay module if the pump operates at a higher voltage than the Arduino can handle.
- Power the Arduino using the power supply.
Program the Arduino:
- Write a program (sketch) for the Arduino that reads the soil moisture sensor's values.
- Set a moisture threshold value in the program. This will determine when the pump should be activated to water the plant.
- Program the Arduino to control the water pump. When the soil moisture level drops below the threshold, activate the pump to water the plant for a specified duration.
const int sensorPin = A0; // Soil moisture sensor is connected to analog pin A0
const int transistorPin = 8;   // Transistor base is connected to digital pin 8

int sensorValue = 0;      // Variable to store the value from the sensor
int threshold = 300;      // Threshold value for dry soil (adjust as needed)

void setup() {
  pinMode(sensorPin, INPUT);
  pinMode(transistorPin, OUTPUT);
  Serial.begin(9600);
}

void loop() {
  sensorValue = analogRead(sensorPin); // Read the value from the soil moisture sensor
  Serial.print("Soil Moisture Value: ");
  Serial.println(sensorValue);

  if(sensorValue < threshold) {
    digitalWrite(transistorPin, HIGH); // Turn on the transistor (LED ON, pump ON)
    Serial.println("Soil is dry. Pump is ON.");
  } else {
    digitalWrite(transistorPin, LOW);  // Turn off the transistor (LED OFF, pump OFF)
    Serial.println("Soil is wet. Pump is OFF.");
  }
  delay(1000); // Wait for a second before reading the sensor again
}
Test the System:
- Upload the program to the Arduino.
- Place the soil moisture sensor in a pot of soil and connect it to the Arduino.
- Fill the water container/reservoir with water and connect it to the water pump.
- Power on the system and observe its behavior. Ensure that the pump activates when the soil moisture level is below the threshold.
Install and Deploy:
- Once tested, install the system in the desired location near your plants.
- Place the soil moisture sensor in the soil of the plant you want to water.
- Position the water container/reservoir above the plants, ensuring the tubing can deliver water to the soil.
- Secure all components in place and tidy up any loose wires.
Comments0
Join the discussion — share a question or tip.
Be the first to share your thoughts on this project.